Teacher Wireless Microphone/Speaker Jabra 510
IMPORTANT! DO NOT LOSE OR MIX UP YOUR USB DONGLE!
Every Microphone/Speaker comes with a USB dongle chiclet to directly connect to your device. Do not lose this, it is not replaceable.
Every Jabra 510 comes with a carrying case that has a slot for the dongle OR you can keep it plugged into your device.

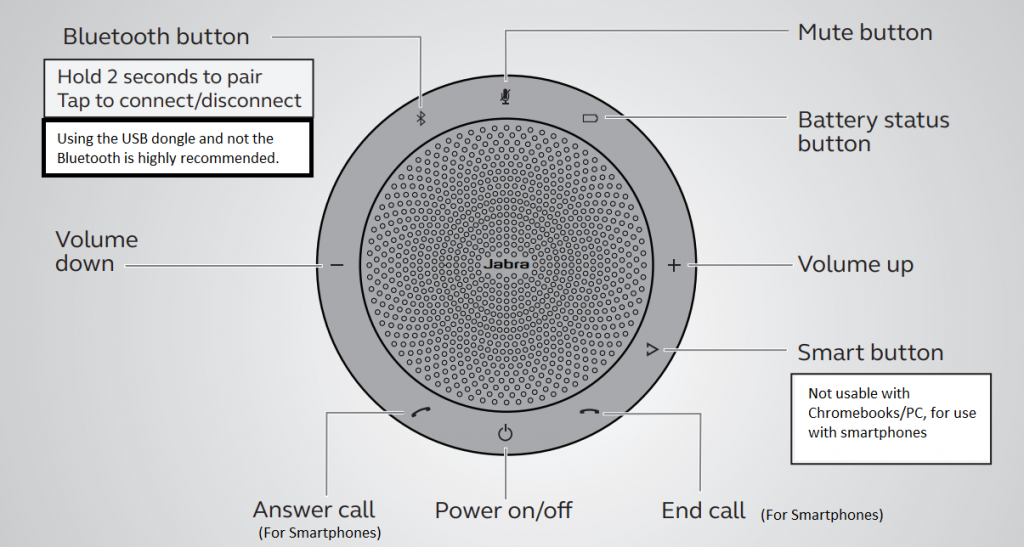
Jabra Physical Buttons


Connecting to your Chromebook
Connect the USB dongle chiclet & Turn on the Microphone
Plug the USB dongle into an available USB port on your Chromebook.


Charging
The device will last approximately 15 hours of USE on a single charge (2-3 full school days of use).
The Jabra 510 has a coiled USB cable attached to it that you can uncoil and charge on any USB port.

Plug the Jabra Speak 510 USB cable into any available USB port on your computer to charge the battery. The battery light is red when charging, and green for 1 minute when fully charged.

Setting your Speaker & Microphone Audio setting on your Chromebook
Once the Jabra is connected and on it will announce “PC CONNECTED”.
To change between the internal speakers and microphone on your Chromebook:
- Go to the bottom right where the time is and click on it.
- Click on arrow to the right the Speaker icon
- You will see “Speaker” and “Jabra” under Output (speakers) and “Microphone (internal) and “Jabra” under Input (microphone).
- Click on the device you want to be used as the default setting, it will have a green checkmark next to it when selected.
- The input (microphone) has an adjustment volume control that you can make louder to pickup more sound if students say you are not loud enough.
See a demonstration of the settings below:

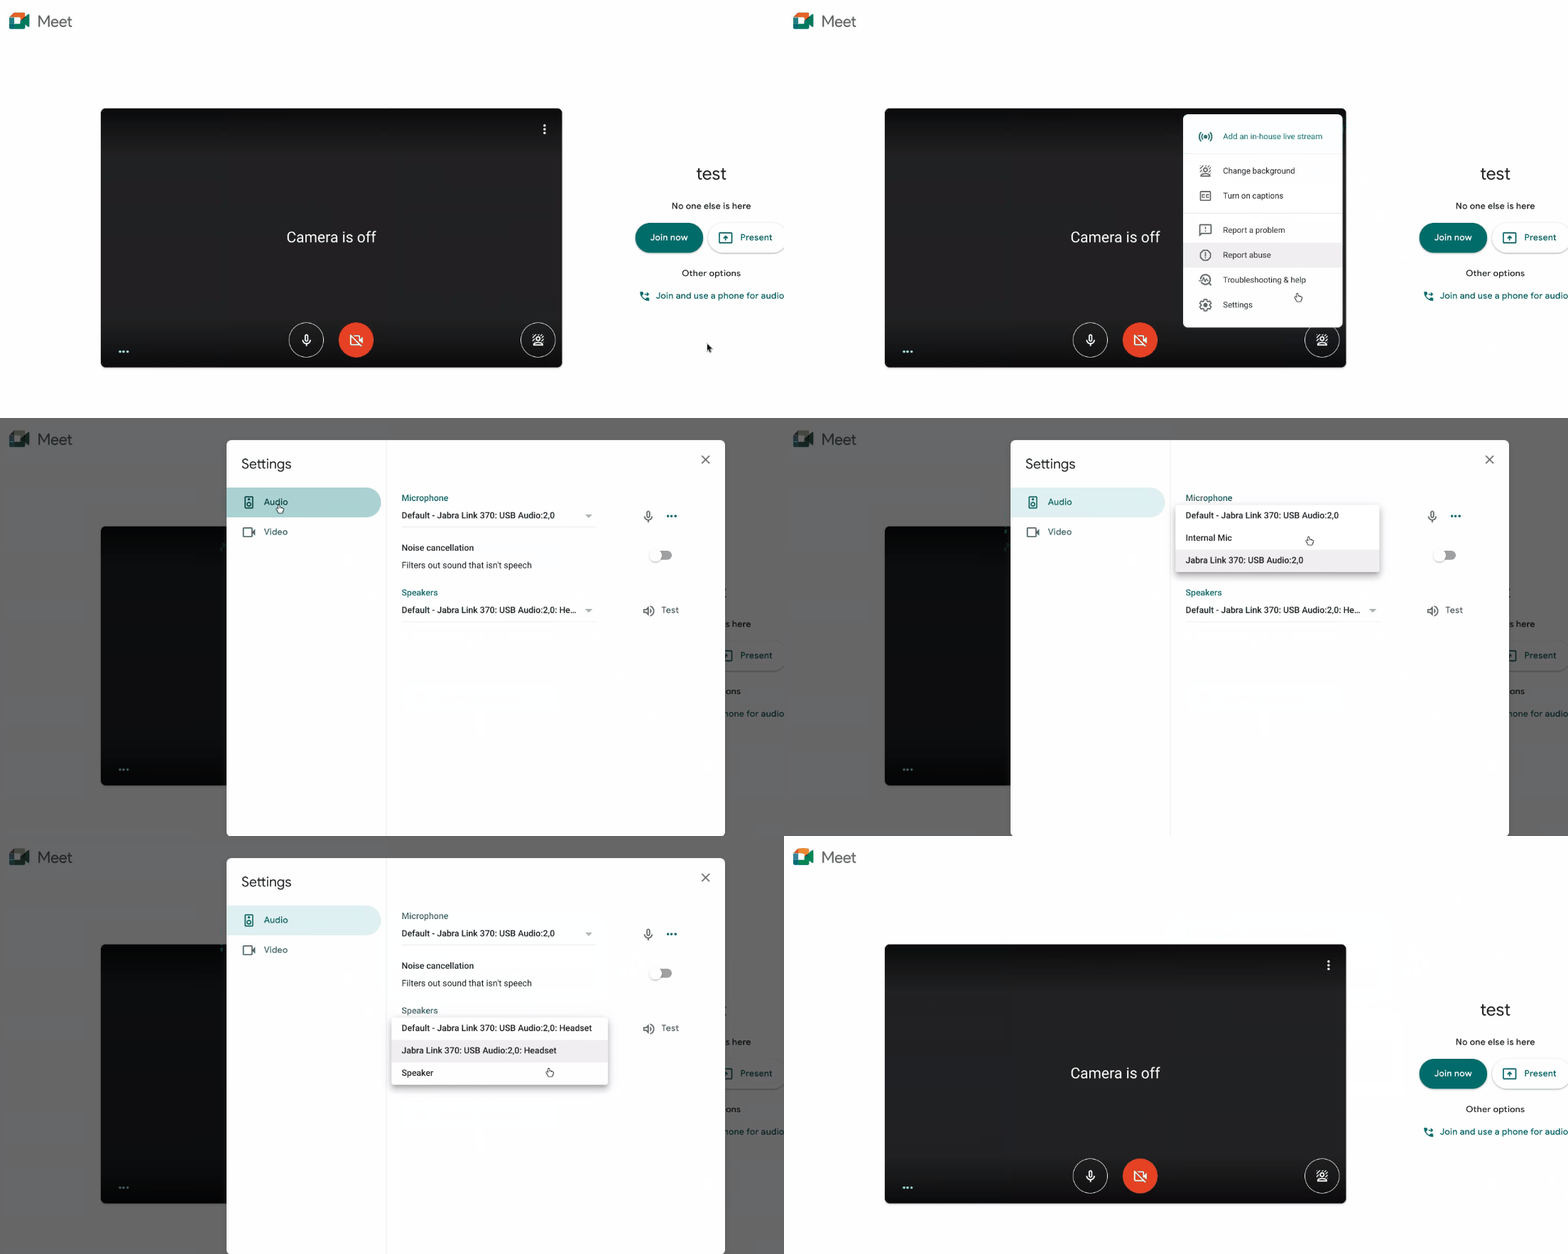
Google Meet Audio Settings
When in a Google Meet Session, it will automatically use your default audio settings, however you can manually adjust these in Meet as well.
- When joining a Meet session click the 3 vertical dots for more options
- Select Settings
- Select Audio if not already on the Audio settings tab
- Here you can select the Microphone and Speaker device setting. In the example below they are already both set to Jabra as the default device as we changed them using the steps above on the Chromebook itself.
